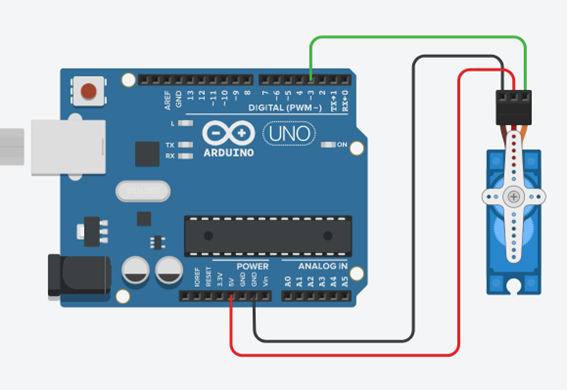
#include <Servo.h>
Servo myservo;
const int SV = 3;

void setup() {
  // put your setup code here, to run once:
  myservo.attach(SV, 500, 2400);

}

void loop() {
  myservo.write(0);  // move motor to 0°
  delay(1000);

  myservo.write(90);  // move motor to 90°
  delay(1000);

}
Group B Meeting on Sep. 21 (vol.3) Daijiro Hashimoto
[[ Topics ]] 1, MG400, ROS 2, Future Plan
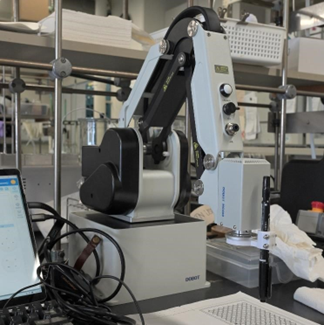
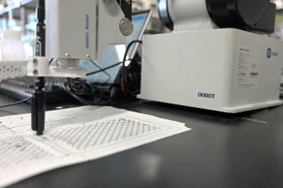
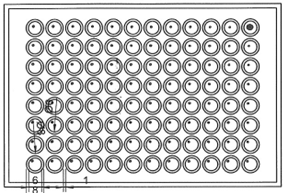
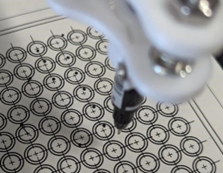
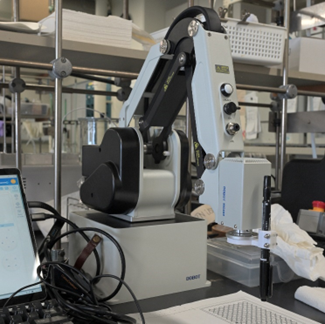
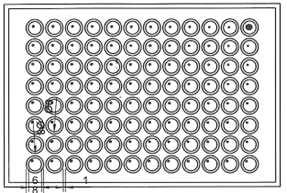
MG400 [Objective: to try new robot] mg400 has arrived. The test is performed using a pen. First, I tested whether we could dot the surface of the well plate with precision. I found the robot arm to be highly accurate.
CAD data
sheen of test
attached to manipulator
コード is here.
code 1
code 2
code 3
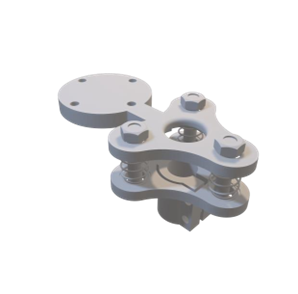
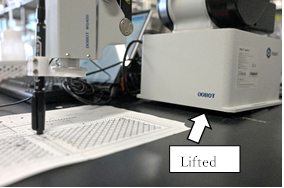
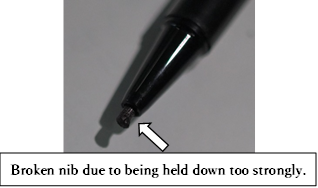
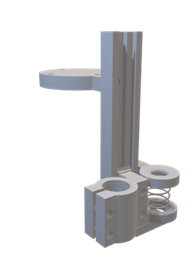
1, A pen nib are damaged. At first, it was done with a v1 holder, but the robot arm did not adjust to the force, and the entire robot lifted, and the nib was crushed.
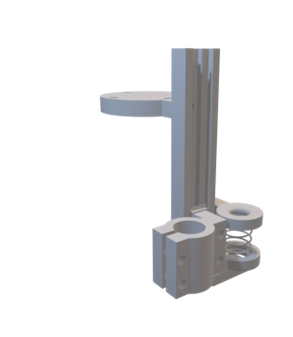
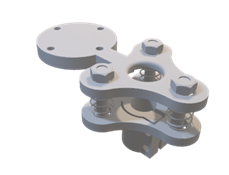
I created a spring-loaded solution(v2).
3d data
result of test
→ When using a robot to make contact, a spring, soft material, or other force-absorbing object is required Control method
Pen attached to manipulator
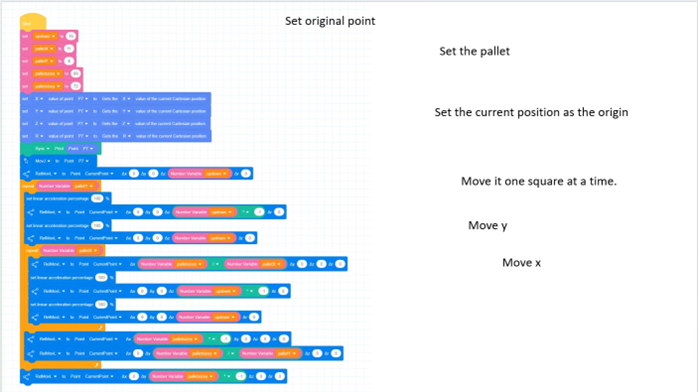
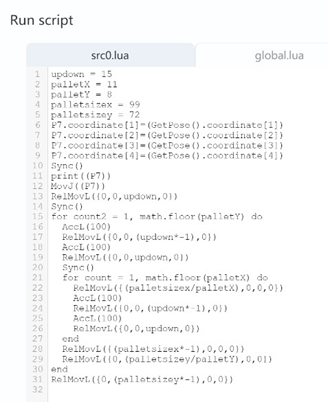
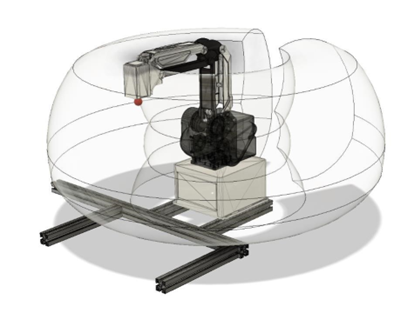
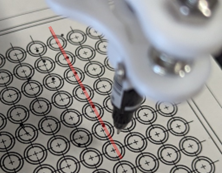
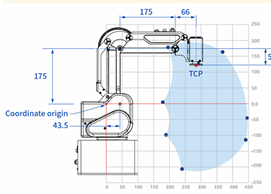
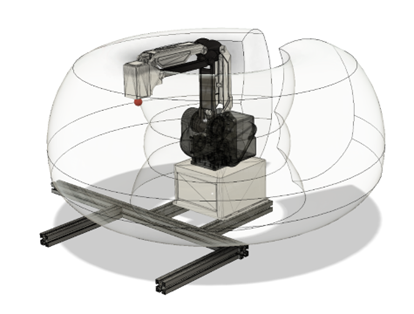
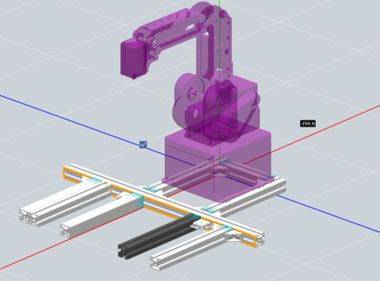
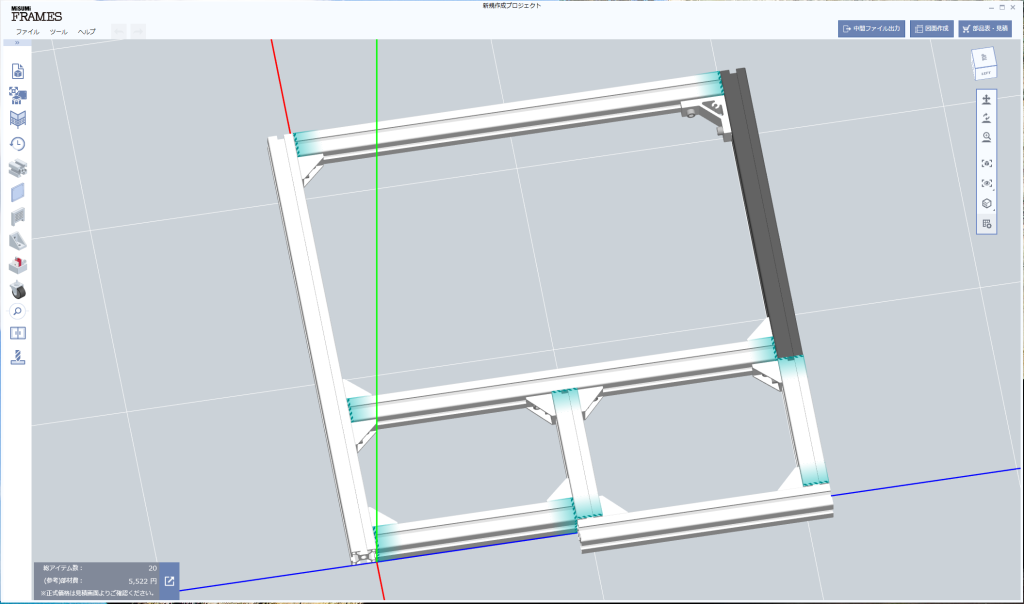
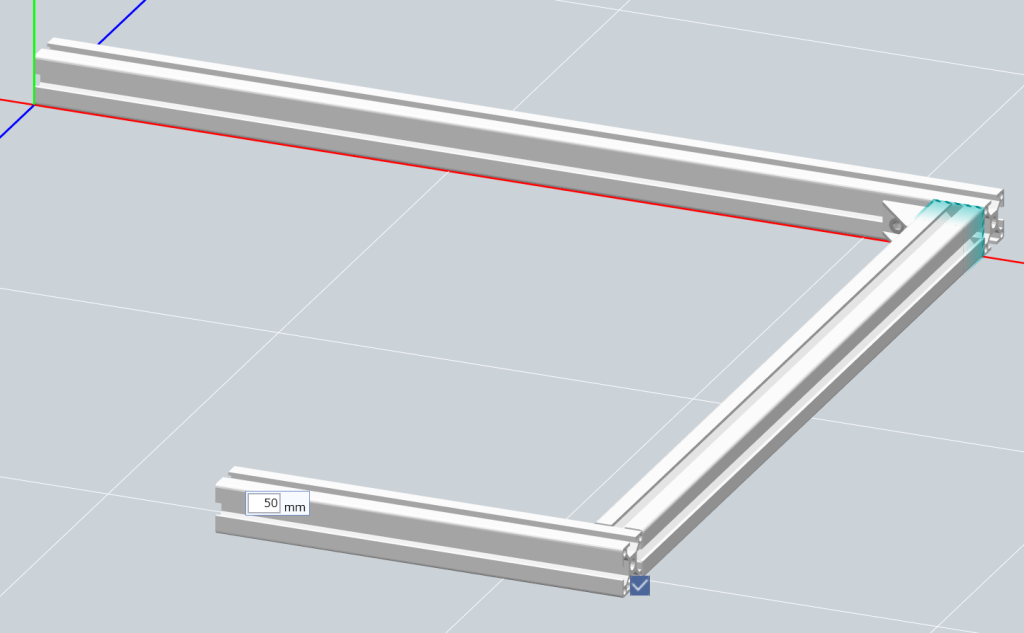
2, Coordinates do not match The program and the actual position must be aligned. In other words, even if the program is correct, it must be placed correctly. It is not impossible to correct the coordinates, →but it is easier to follow the guide. Range of motion Aluminum frame design
pen
range
range
CAD data
Conclusion 1, Need spring or soft material (if contact to something), 2, Need guide to place correct, Of course, appropriate end-effectors are also needed. Future Plan Straight lines cannot be drawn with the v2 pen holder. Create one with guides so that only up and down movement is possible. Planning(v3)
A similar move will be made in Python. → Use Python+ROS Red line (I want to write) pen holder V3 All codes work the same way. → same program Standard software is programmed in lua language
September 28, 2023
a page from word file
DaijiroHashimoto
xGroup B Meeting on Sep. 21 (vol.3)
[[ Topics ]]
1, MG400, ROS 2, Future Plan
MG400 [Objective: to try new robot]
mg400 has arrived. The test is performed using a pen. First, I tested whether we could dot the surface of the well plate with precision. I found the robot arm to be highly accurate.
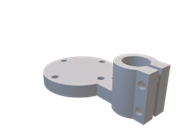
Pen holder
CAD data
MG400
コード is here.
1, A pen nib are damaged.
At first, it was done with a v1 holder, but the robot arm did not adjust to the force, and the entire robot lifted, and the nib was crushed.
I created a spring-loaded solution(v2).
Pen holder v2
result of test
→When using a robot to make contact, a spring, soft material, or other force-absorbing object is required.
2, Coordinates do not match
The program and the actual position must be aligned. In other words, even if the program is correct, it must be placed correctly. It is not impossible to correct the coordinates, →but it is easier to follow the guide.
direction are not match
move range
Range of motion
Aluminum frame design
Conclusion
1, Need spring or soft material (if contact to something), 2, Need guide to place correct,
Of course, appropriate end-effectors are also needed.
FuturePlan
Straight lines cannot be drawn with the v2 pen holder. Create one with guides so that only up and down movement is possible. Planning(v3) A similar move will be made in Python.
→ Use Python+ROS
All codes work the same way.
→ same program
Standard software is programmed in lua language
test D from PDF
DaijiroHashimoto
Group B Meeting on Sep. 21 (vol.3) Daijiro Hashimoto [[ Topics ]] 1, MG400, ROS 2, Future Plan MG400 [Objective: to try new robot] mg400 has arrived. The test is performed using a pen. First, I tested whether we could dot the surface of the well plate with precision. I found the robot arm to be highly accurate. コード is on the last page Pen attached to manipulator 1, A pen nib are damaged. At first, it was done with a v1 holder, but the robot arm did not adjust to the force, and the entire robot lifted, and the nib was crushed. Lifted I created a spring-loaded solution(v2). →When using a robot to make contact, a spring, soft material, or other force-absorbing object is required Broken nib due to being held down too strongly. Control method 2, Coordinates do not match The program and the actual position must be aligned. In other words, even if the program is correct, it must be placed correctly. It is not impossible to correct the coordinates, →but it is easier to follow the guide. Range of motion Aluminum frame design Conclusion 1, Need spring or soft material (if contact to something), 2, Need guide to place correct, Of course, appropriate end-effectors are also needed. Future Plan Straight lines cannot be drawn with the v2 pen holder. Create one with guides so that only up and down movement is possible. Planning(v3) A similar move will be made in Python. → Use Python+ROS Red line (I want to write) pen holder V3 All codes work the same way. → same program Standard software is programmed in lua language
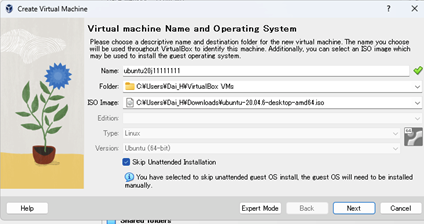
1, Close Linux, at setting set video memory to 128MB and check “enable 3D acceleration”. (With the default setting of 12MB, the screen display went wrong.)
4, restart Linux 5, Press “Insert Guest Additions CD image…” ‘and “RUN” (or open CD, then rightclick to “autorun.sh”, “run as program”) 6, And then restart 7, “Machine”→”Setting”→”General”→”Advanced”→”Shared Clipboard” and “Drag’n’ Drop” to Bidirectional.
A cobot, or collaborative robot, is a robot intended for direct human-robot interaction within a shared space, or where humans and robots are in close proximity. Cobot applications contrast with traditional industrial robot applications in which robots are isolated from human contact.[1] Cobot safety may rely on lightweight construction materials, rounded edges, and inherent limitation of speed and force, or on sensors and software that ensure safe behavior.
A cobot, or collaborative robot, is a robot intended for direct human-robot interaction within a shared space, or where humans and robots are in close proximity. Cobot applications contrast with traditional industrial robot applications in which robots are isolated from human contact.[1] Cobot safety may rely on lightweight construction materials, rounded edges, and inherent limitation of speed and force, or on sensors and software that ensure safe behavior.